
A large proportion of the users who perform maintenance work do not need all the features available in INEXTIA. They just need to see what work needs to be done and register when it is done.
This type of user is also carrying out "unplanned" work, which must also be registered.
The app is targeted at just these users. Therefore, the functionality of the app only reflects what is needed in these two scenarios, to make the app simple and functional for the user.
Home page
The home page in the app shows an outline of the job lists belonging to the user of the app. Read this article for information about creating job lists.
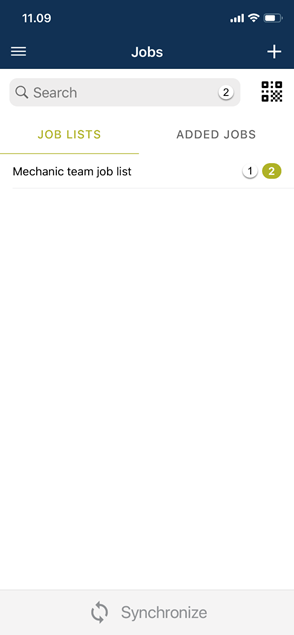
The user will usually only have one job list belonging to them, which would be the job list with the jobs concerning the user.
In some cases, it makes sense to give the user multiple job lists, if the user for example should be able to view and retrieve information from jobs belonging to other users or jobs that require special planning. This could also be jobs that has to be carried out by an external company.
- Click on a job list from the home page to see jobs that are to be carried out. (The number in the green circle shows the number of jobs on the list)
- When looking for a specific job, the search field can be used.
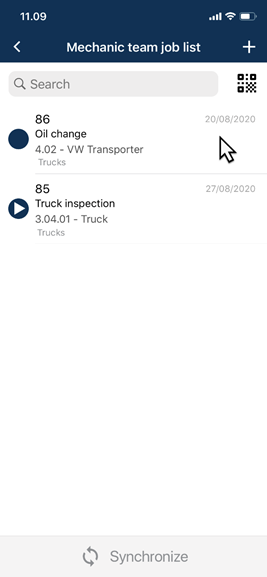
Now choose a job list
The screenshot below shows the jobs in the chosen job list. Jobs with the status “TO DO” are marked with a dark blue circle.
Now choose the job that you would like to carry out.
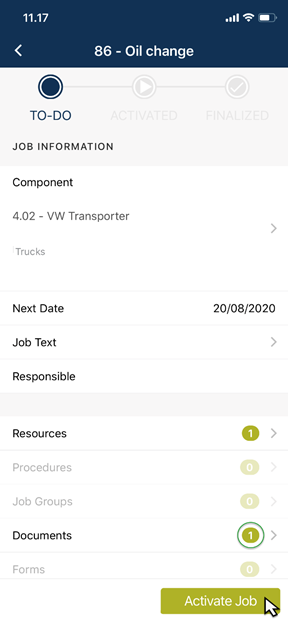
This will open a screen, showing the details of the chosen job.
If information is attached to the job, etc. documents, these can be retrieved by clicking on the arrow. The green circle containing numbers shows how many attachments each category has. To start the job, click on the “Activate Job” button.
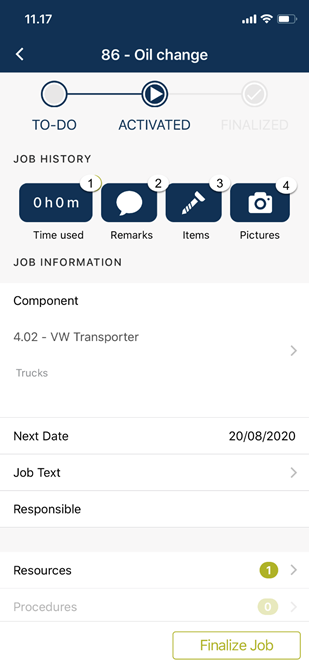
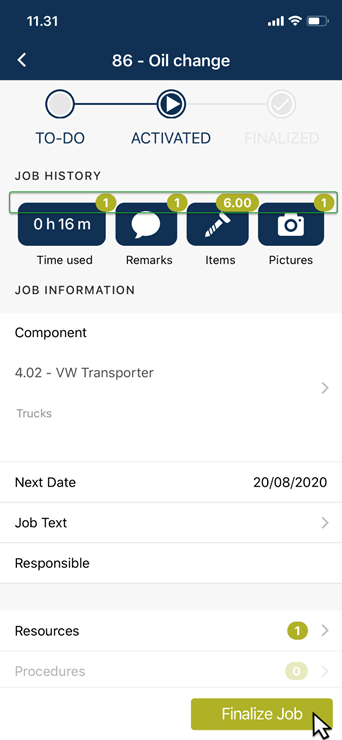
After clicking on the “Activate Job” button, the job’s status will change to “ACTIVATED”. This status is symbolized with a dark blue circle containing an arrow, as seen on the screenshot below.
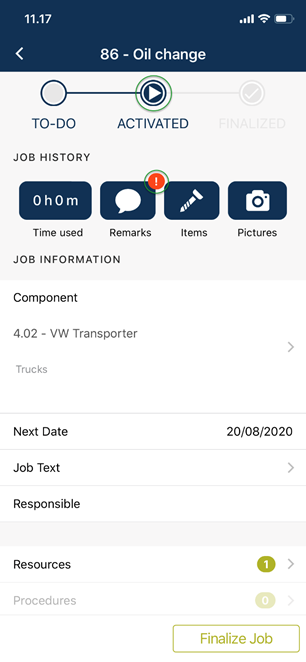
The job has been activated.
If red exclamation marks are shown as on the screenshot above, these indicates that data must be added to certain categories as a minimum in order to finalize the job. When data has been added, the job can be finalized by clicking the “Finalize Job” button.
If you want to add data, the following can be added:
- Time used to carry out the job.
- Remarks to the job.
- Items used to carry out the job.
- Pictures from the job.
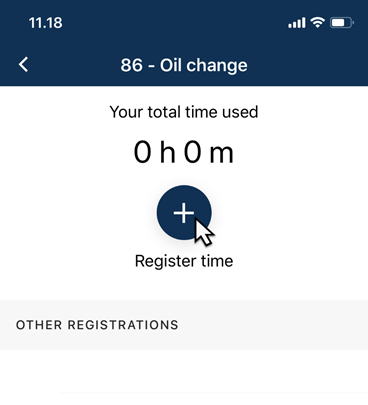
1: Time used
To register time used to carry out the job, click on the icon. This will take you to the following screen:
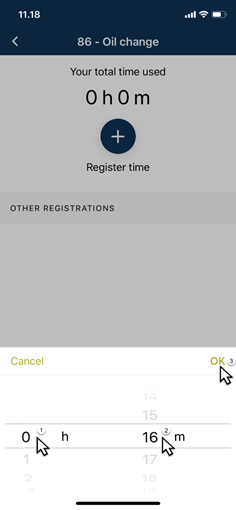
Then click on the + button. The following screen containing a time picker will now show. When the correct hours and minutes spend on the job is selected, click on “OK”.
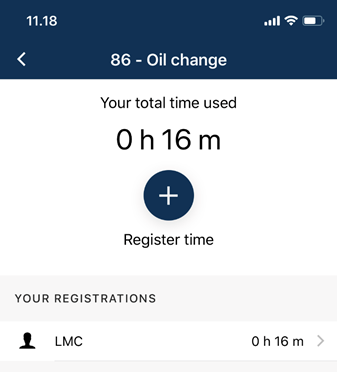
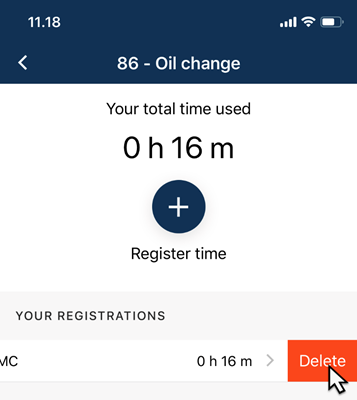
The time used on the job is now registered. To return to the job, press the arrow button.
Please note: When wanting to delete a registration, this can be done by swiping it to the left and clicking on “Delete”, as seen on the screenshot below:
2: Remarks to the job
Click on the icon to describe how the job has been carried out. This will take you to the following screen:
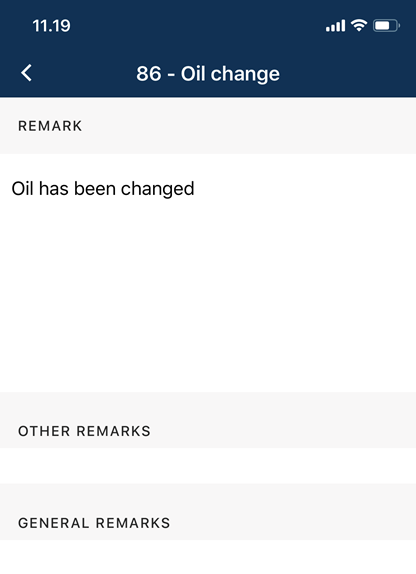
Remarks can now be added by clicking on the “Remark” field.
Other user’s remarks can be read underneath. Click on the arrow button to return to the job.
3: Items used to carry out the job
To register items used to carry out the job, click on the icon. The following screen will now show:
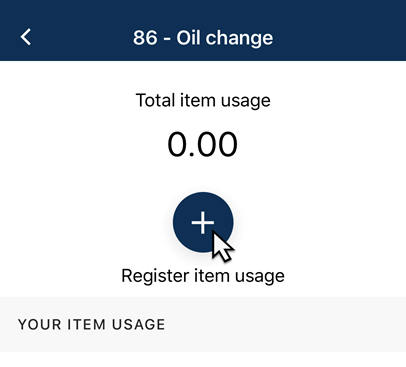
Click on the + button. The following screen will now show, where the correct item(s) is chosen and the quantity used is registered by following these stops:
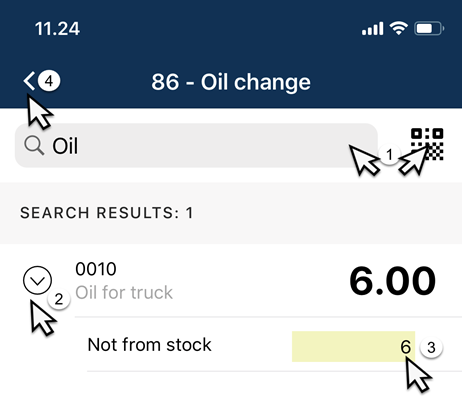
- Search for the item or QR-scan it to find it.
- Choose the item.
- Register the used quantity from the stock which the item belongs to.
- Return to the overview of the total item consumption by clicking the arrow button.
The use of items is now registered and the following screen is shown:
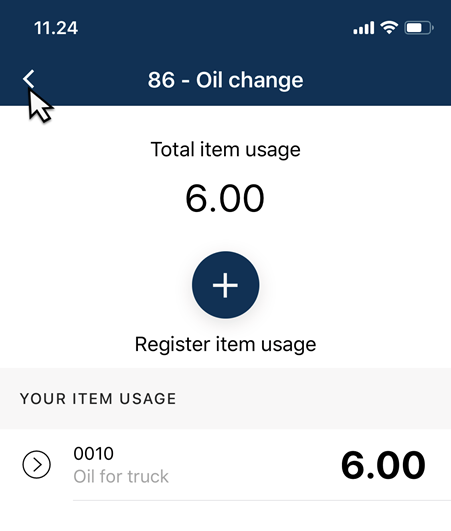
Return to the job by clicking on the arrow button.
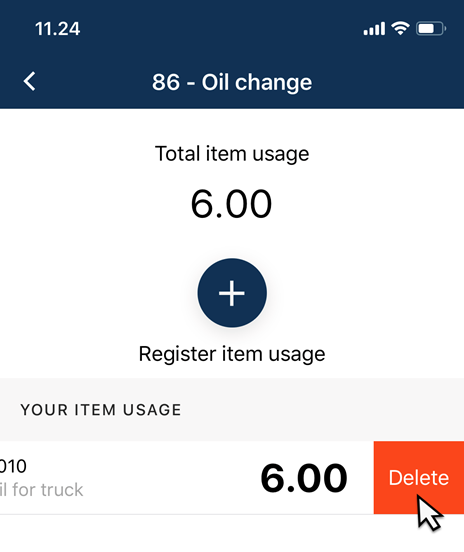
Please note: When wanting to delete a registration, this can be done by swiping it to the left and clicking on “Delete”, as seen on the screenshot below:
4: Pictures from the job
To upload pictures from the job, click on the icon. The following screen will now show:
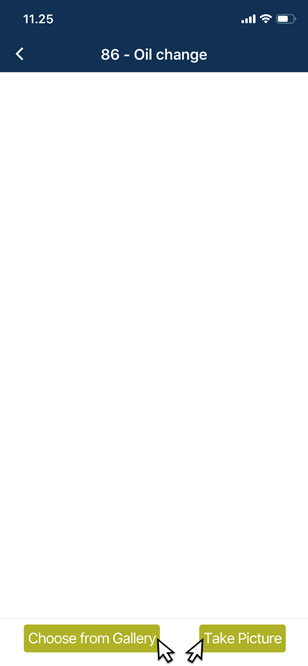
You can now choose to add a picture that you have already taken by pressing the "Choose from
Gallery" button, or to add a new picture which you take with your mobile phone or tablet by pressing the "Take Picture" button. The first time you press one of the two buttons, your mobile phone or tablet will ask for permission for the INEXTIA app to access your pictures and camera, respectively. It is important that you give permission to this, as this is necessary to be able to add pictures.
When the preferred pictures has been added, return to the job by clicking the arrow button.
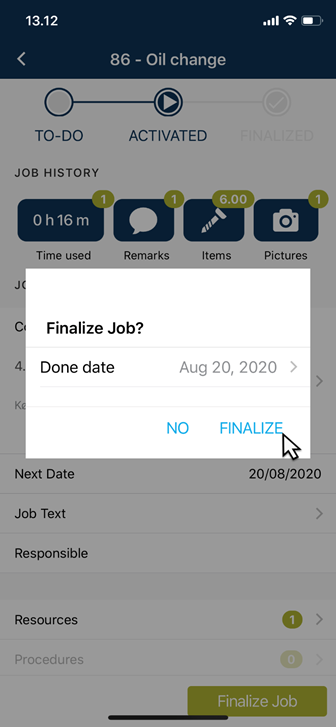
When all the preferred data has been added to the job, green circles with numbers will show at each icon in the Job History. If you would like to finalize the job, click on the “Finalize Job” button.
A window called “Finalize Job?” will now show. Now choose the day that the job was carried out. Today’s date will show as standard but can be changed when needed. When the right date has been set, press “FINALIZE”.
The job is now finalized. It is no longer possible to add or edit information. The status of the job has been changed to “FINALIZED”, shown by a dark blue circle with a check mark.
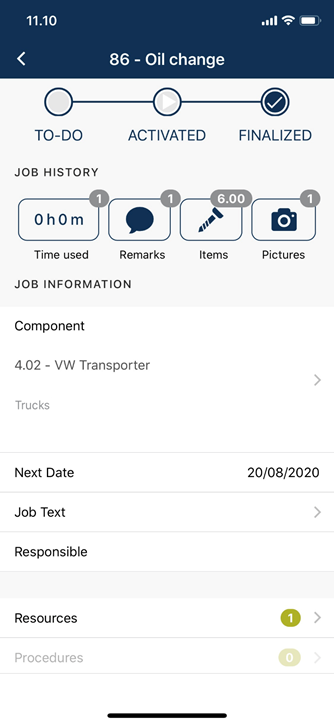
The job will disappear from the job list when synchronizing the INEXTIA app.
Comments
0 comments
Article is closed for comments.