
Please note: Forms is an add-on purchase to INEXTIA
The forms module is used in INEXTIA to handle tasks that would typically be carried out as physical paperwork, that afterwards would have to be attached in e-mails, archived or as an enclosure. This could be check lists and schedules for weekly inspections of equipment, service reports and additional data collection. Instead, these tasks can be performed in INEXTIA in a structured way using jobs with attached forms, thus contributing to a better quality assurance of data.
The module can be accessed from the menu on the left side of the screen.
Forms are filled out using predefined templates, which shows which information are to be filled out for a specific type of work. Every business is different, and of course there is a difference between things to document. Eg. you can have a list of items regarding service inspection of a vehicle, and a completely different list when it comes to the annual inspection of a pumping station. The tasks mentioned are just two of the many different types of work that the form module can help with.
Create a form template by going to the Form Templates page and clicking this button:

This example will show the creation of a form template for a truck inspection.
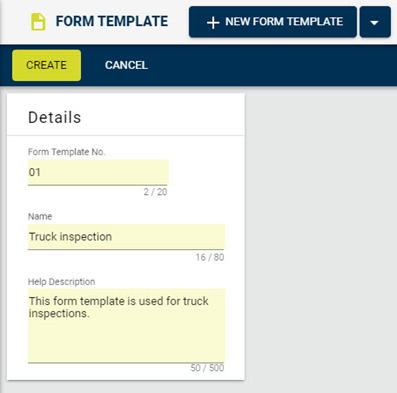
As shown above, the form template is created with a number, a name and description if needed. Next, click on the “CREATE” button. To start building the form template in the form template designer, click the “EDIT FORM TEMPLATE” button.

The form template can be built by adding different kinds of fields in the form template designer. There are many types of fields in the form template designer, which in their own ways helps to make it easy for the user to fill out the form.
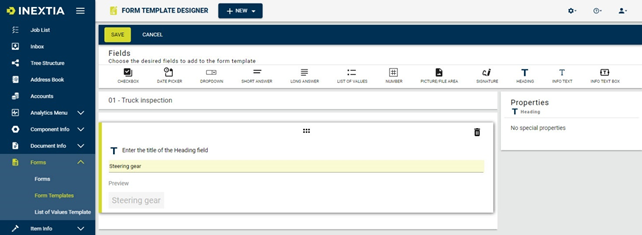
This example will start by creating a header for the first section of the truck inspection. Click on the “HEADING” button under “Fields”. Now type desired text in the header as seen below, where steering gear is used as an example.
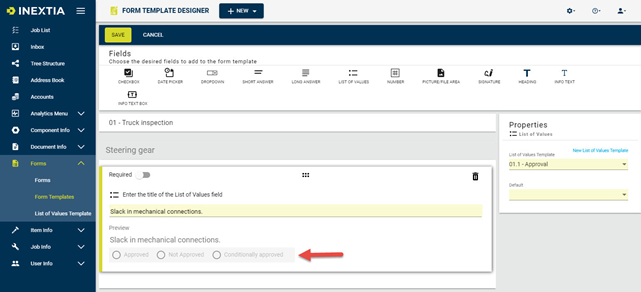
Next, the first checkpoint is added: Slack in mechanical connections. There are different options for checkpoint, but in this example a list of values will be used. By clicking “LIST OF VALUES” in Fields, the field will show as seen below. Now type the title of the list of values and choose if the field is required to be filled out by the user.
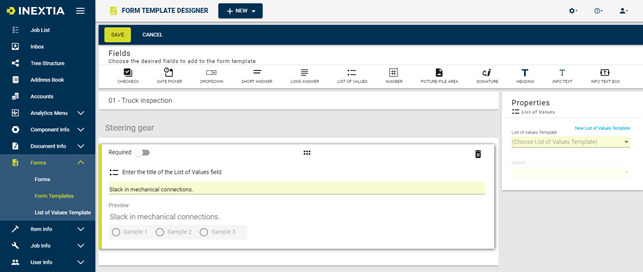
To add values, click on New List of Values Template in the Properties menu on the right side. The following screen will now show:
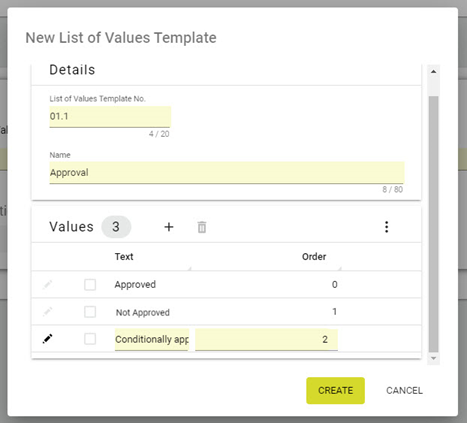
Before values can be added, choose a name and a number for the list of values template, then add values by clicking on the + button. Next, add text and the order in which the values should be displayed. When done, click on the ”CREATE” button.
Please note: If you want to view and edit existing list of values templates or add new ones, proceed to “List of values” sub-menu placed on the left side of the screen. Remember to save before leaving the current screen. List of values can be used in different form templates, therefor the example from the screenshot can be used in different contexts.
Going back to the form template designer, the list of values is now chosen in the Properties menu. When preferred, a value from the list can be set as standard choice.

When the values are added to the list, an example will show as shown below:
Additional fields can be added like a date picker and a remark.
When adding a date picker, the following field will show:
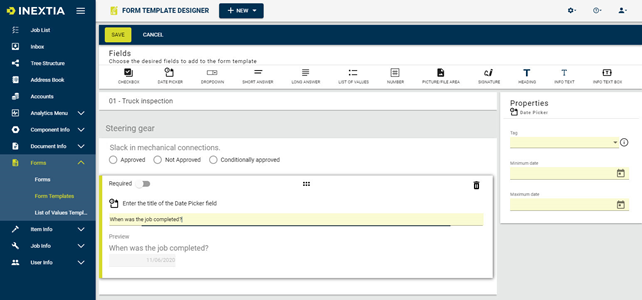
In the screenshot above, the title of the date picker has been set to “When was the job completed?”. In the Properties menu on the right, a minimum and a maximum date can be added. This indicates the period in which the user can report a date.
To add a remark to the form template, click on the “LONG ANSWER” field. The following field will now show:
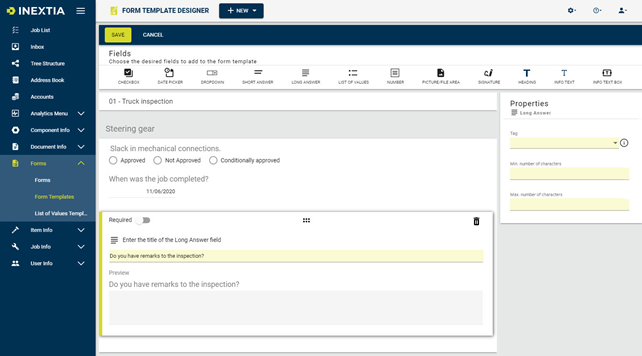
In this example, the title of the long answer is “Do you have remarks to the inspection?”, which the user can reply to when filling out the form template.
Move or delete fields
If you would like to move a field in your form template and the order in which they are shown in the finished form template, this can be done by pulling the fields to the desired position. First, activate the field by clicking on it, then drag the field to the desired position while clicking on the  icon.
icon.
If you would like to delete a field, click on the icon. INEXTIA will then ask if you want to delete the field. Click on “OK” or “CANCEL”.
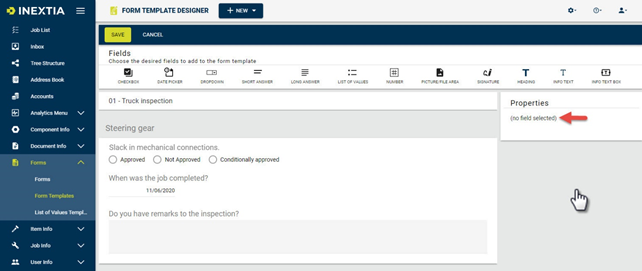
To gain a better overview of the fields in the form template designer, click a random spot in the designer, which does not contain any fields. This will make all fields inactive and then show a simple overview of the form template designer’s content as shown below:
Finish the form template
When your form template is done, click on the “SAVE” button. INEXTIA will now show your finished form template.
Please note: If you would like to edit the content in the form template, click on the “EDIT FORM TEMPLATE” button. If you only want to edit the form template’s details, click on the “EDIT” button.
Comments
0 comments
Article is closed for comments.